Important things you should consider before recording any content
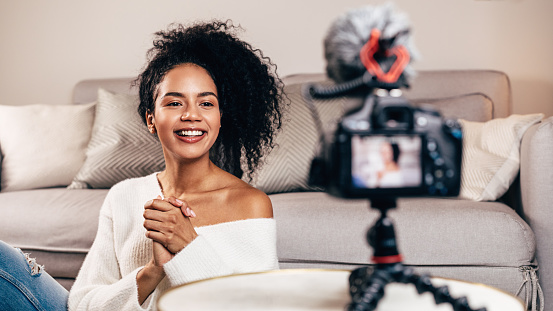
For many beginning vloggers, filming can be the most arduous part of making a video. If you’re new to using a professional camera, it can seem even harder. However, with practice, you’ll be a pro in no time, but in the meantime, a few helpful hints won’t hurt.
To make filming easier, do these three things before you record.
1. Write a brief script and shot list.
Sometimes, when you sit down to film a video, you might not even know where to begin. Then, when you edit, you may wish you’d gotten footage of this or an audio clip of you saying that. Occasionally, you may even decide to reshoot altogether just to make sure you have everything you need.
To keep your editing from feeling like a scavenger hunt for usable footage, you should jot down a brief script and shot list before you begin. Start by writing your script. Whether or not your content is considered “scripted,” you can benefit from organizing your thoughts before you go on camera. Put the points you want to hit in the video into bullet points. Then, when you film, keep your notes nearby.
Next, use your script to guide your shot list. Write down the shots you want to film for each part of your script. Consider writing down more shots than you think you’ll need to give yourself options when you edit.
2. Test your framing and lighting on a friend.
Another challenge when it comes to filming is getting your framing and lighting right. While you can keep an eye on your frame in your camera’s viewfinder, a lot of viewers express frustration with creators who watch themselves in their viewfinders during videos.
The best alternative is to test your framing and lighting on a friend before you start filming. If you can, find someone who is similar to you in height. Then, have them sit or stand in your place in front of the camera. Now, utilize the rule of thirds. Looking into your viewfinder, imagine the frame as a three-by-three grid. Adjust the position of either your camera or your friend so that their face is at a point of intersection on the grid. Once your friend is in the right position, you might put a piece of tape on the floor or snap a picture so that you’ll know exactly where you should be.
While your friend is still in the proper frame, adjust your lights until it looks good in the viewfinder. Ideally, this should be done at the same time of day you plan to film to account for any changes in natural lighting. However, if you’re under time constraints, hang blackout curtains or a heavy blanket over any windows in your filming room. Once you’re finished, leave any lights or lamps exactly where they are so that it will look exactly the same when it’s time to film.
3. Adjust your camera’s focus manually rather than relying on autofocus.
A lot of creators, no matter what their level of experience, struggle with autofocus. While the feature is great in theory, it becomes more of a crutch than a tool to vloggers who find themselves going in and out of focus on screen. A lot of viewers express frustration with the constant shift in focus that autofocus can cause.
Therefore, you should learn to adjust your camera’s focus manually. Then, you can set the focus yourself before you press record. Your video will look cleaner, sharper, and more professional. Most importantly, your viewers won’t be distracted by a shift in the camera’s focus.
To make manual focusing easier, keep your background clean. Swap out any distracting patterns or clutter for a more minimalistic design. Keep the camera focused on your face. If you need to focus on anything else, such as a product you’re reviewing, get it in a separate close-up shot.
To make filming easier, prep your script, shot list, framing, and lighting before you even think about pressing record. Learn to adjust your camera’s focus manually as well
Related Posts


